
Hello friends! I'm here today to share a quick Kraft Outlet Watch Us Wednesday tutorial for a cute little pinwheel accent. This is REALLY easy, so please don't be intimidated. I started with a Small Kraft Paper Sack that I folded into a little gift pocket that I've shared in a previous tutorial. These make great gift card holders. And now....here's how to make your Pinwheel:
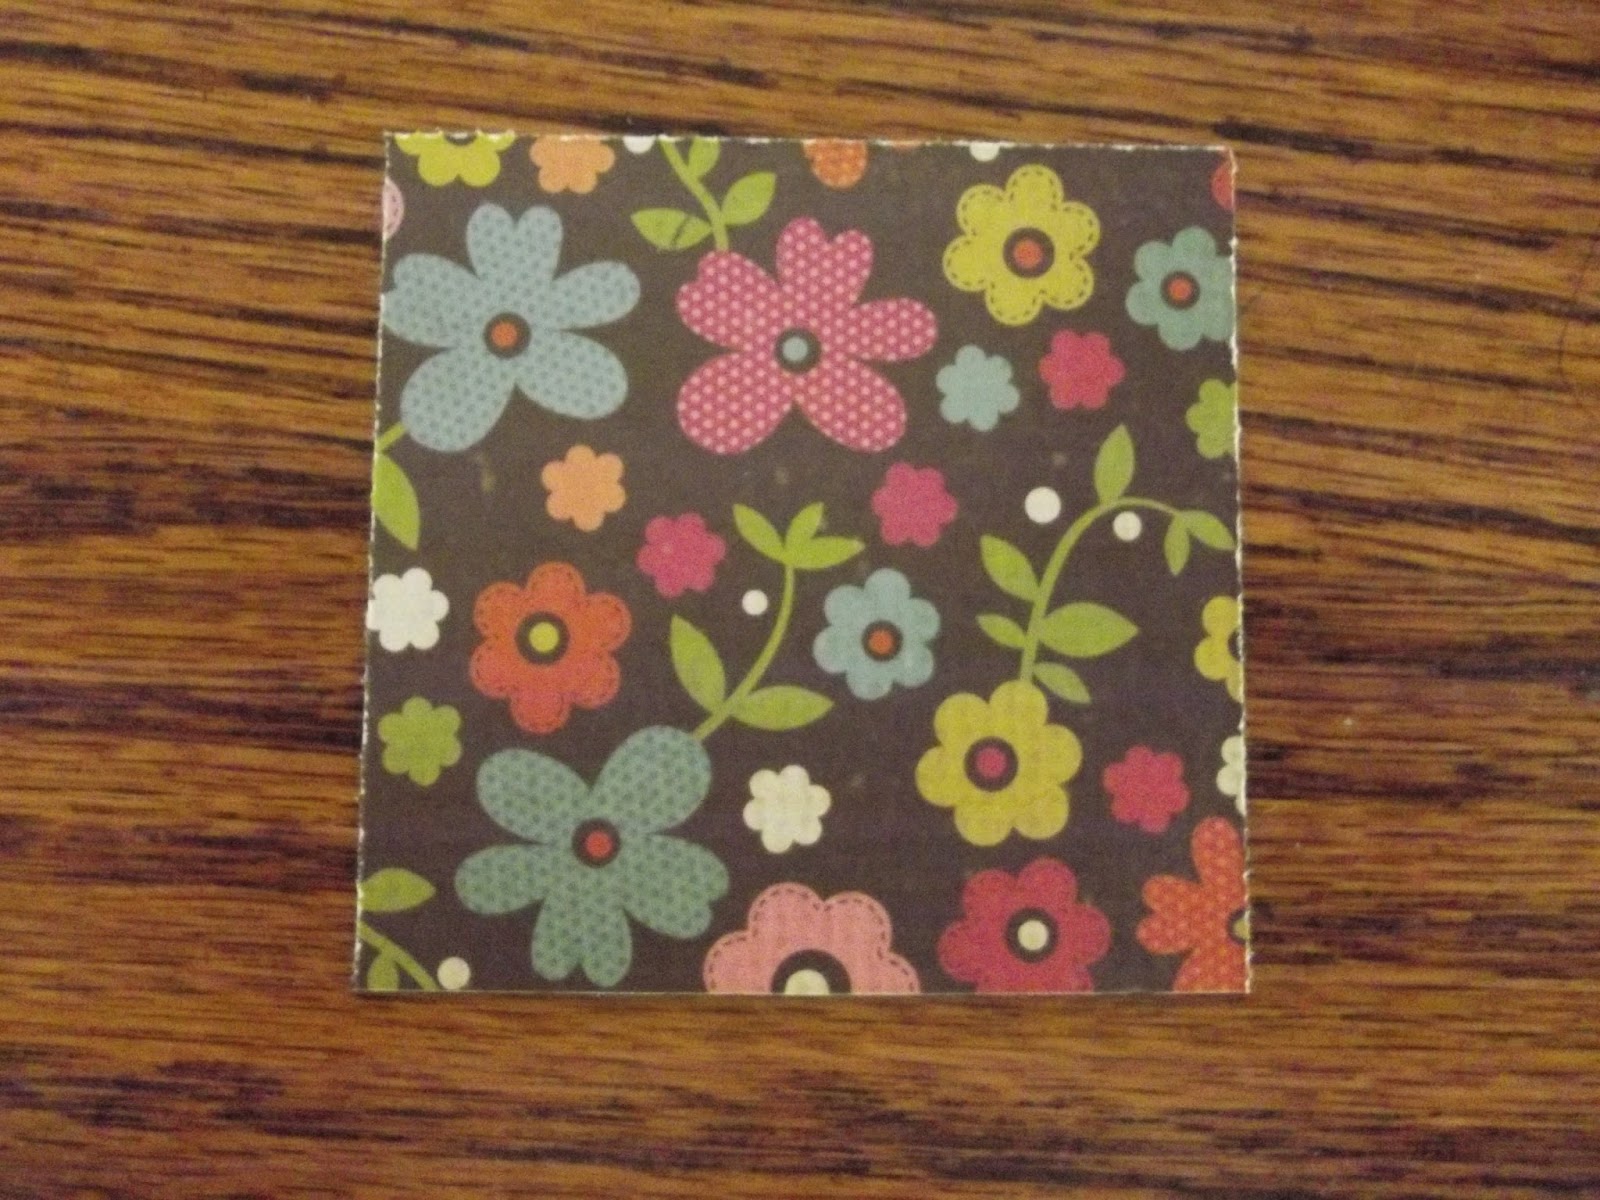
Start by cutting yourself a perfect square using double-sided patterned paper. I used some lovely Simple Stories papers that have a cute print on each side. You can cut anywhere from a 1 1/2 up to a 4-inch square depending on what size pinwheel you wish to create. This particular pinwheel is made from a 2 1/4 inch square.

The next step is to "score" your square from corner to corner diagonally. To "score" (make a groove in your paper without cutting) my paper, I placed it in my cutter, lined up the corners, and used my Bone Folding Tool in the groove of the cutter to make the indentation showing you where the folds should be made. Once I scored both corners, you will see in the next photo that I made a small X with my pen.

The reason for making the X is so that when you cut your lines, you will remember to stop at the X and not cut all the way through your paper. This is the most important step to remember.

This is the area where you will place your glue to make your pinwheel, so be sure that you do not cut all the way through. You want to leave enough room to place your brad at the end.

You grab every other corner, bringing it to the middle, and using a little dab of glue, secure it to the uncut area in the center of your square. Can you see how your pinwheel is beginning to appear? Once all your corners are secured to the center of the pinwheel, you're almost finished! The last step is to secure your pinwheel permanently by placing a brad in the middle. I used a Tim Holtz Custom Fastener to secure the center of my pinwheel.

I placed a darling little Jenni Bowlin Sillhouette Card in the back pocket where the gift card will also go, and also added some lovely seam binding from Paper Sweeties and a rub-on sentiment that I picked up at JoAnne's. Be creative, and have fun! There are all kinds of neat ideas as how to use a pinwheel. Let your imagination run wild! I hope you've had fun learning this technique. You can find the supplies I used, and everything a crafter could ever want, at our fabulous store, The Kraft Outlet.
Thanks for stopping by today, and have a great week. Don't forget to join our 'Layers" challenge this week at The Kraft Journal Challenge Blog. You're also welcome to join our Anything Goes challenge over at Word Art Wednesday and our Twine Challenge at V's Sweet Ideas. Come on, get crafty!
Blessings to you all,
Karen
Simon Says Stamp - August 7 Challenge - Triangles - I made this pinwheel using a basic triangle method. By folding each corner up, you create the triangles in your pinwheel. It's a great Math lesson as well. Triangles are everywhere!
Pinwheels are so much fun! Thanks for sharing this! :o)
ReplyDeletec'est tellement joli Karen, très poétique et coloré, une vrai carte estivale, biz
ReplyDeleteJust darling, and fun with the pinwheels. Good tutorial for the pinwheels too. I have a die cut I use for mine. But if I need some bigger than that I can use your tutorial. Hugs
ReplyDeleteJust had to pop over and tell you that I love this little card and the pinwheels are so sweet! Great tutorial...will have to try to make a pinwheel now. :)
ReplyDeleteHave a wonderful day!
Hi Karen! This is such a clever idea and I can't wait to try it out! I stopped over here to tell you thank you for all of your encouragement and sweet comments you leave on my cards on SCS. You are such a blessing and an uplifter!! God bless! Jan aka Precious Kitty
ReplyDeleteThis is a great and simple to follow tutorial. Your sample application is gorgeous too. Blessings!
ReplyDeleteThese pinwheels are delightful!! Thanks for sharing! ~ Blessings, Tracey
ReplyDeletehttp://gracescraps.blogspot.com/
Such sweet and cute pinwheels, love the patterned paper you chose. Thanks for sharing the tutorial Karen!
ReplyDeleteThis is so pretty, Karen! Great tut for the pinwheels!!
ReplyDeleteYour gift card holder looks like a gift all by itself! The pinwheels are the perfect touch! Love it Karen!
ReplyDeleteI'm sorry, but this just couldn't be any cuter! Love it girlfriend!
ReplyDeleteGorgeous card, love the pin wheels and fab papers.
ReplyDeleteThank you for joining us at Simon Says Stamp Wednesday challenge.
luv
Debby