Wednesday, August 28, 2013

Helpful Tips From The Kraft Journal

Every Wednesday at The Kraft Journal, we have a special feature called "Watch Us Wednesday", and we share lots of fun photos, inspiration and helpful tips.  This week, our Design Team Members have shared some helpful tips for crafting.   The tip I shared this week was one that I learned while I was on vacation this summer.  If you stop at your local liquor store and ask for their long, narrow bags (shown in the photo below), you can make the most adorable mini albums using them.  You will see that I scallop punched the edges of my bags.  They come in different lengths, and of course, they come with built-in pockets (my favorite feature - well, other than the fact that they're free).  They don't look like much here, do they?  But, they make the cutest mini albums.  Take a peek!
You simply fold the bags in half (mine aren't quite in half evenly....they have one side folded a bit longer than the other) and then you decorate them and bind them.  I used my Zutter machine to bind mine.
I used LOTS of sweet October Afternoon goodies along with several other embellishments including some from The Kraft Outlet.  I just kept adding on more and more until I was happy with how it looked.  The photo below uses an October Afternoon chipboard element (Special Today).
Another great tip that you can see quite a bit of here on this mini album, is that I run my journaling cards and stickers through the computer to print out the perfect sentiment or scripture.  This trick works great when you can't seem to find just the right words you're looking for in either a stamp or rub-on.
I used some wool felt from Prairie Point Junction to cut out this Papertrey Ink doily.  Their high-quality wool felt cuts through even those small holes just beautifully, and I recommend this wool felt to everyone.  It's just awesome!
I tucked tags into each of the pockets, and these can be used for journaling or placing photos and other memories.  You may notice that I did VERY LITTLE sewing on this project as my sewing machine is still not working properly.  Boo Hoo!
The shabby looking flower I used is one of my favorite new die-cuts.  It's from Die-Namics and it's called Loopy Flower Die.  I used a soft cream muslin to cut these flowers and I just love how they look on cards and projects.
I have so many different embellishments used on this mini album that it's hard to name them all; but if you see something you like and want to know about, just leave me a comment and I will get you the specific information.  The above photo shows my chipboard (blue) element from My Mind's Eye.
The silhouette children stamp is from Hero Arts (another favorite), and I also used a Freckled Fawn tag, and a Tim Holtz Adage Ticket (trust) from The Kraft Outlet to match the Bible verse.  I also used lots of trims, seam binding, flowers and several October Afternoon products.
 
Here's where I'm sharing this mini album:
 
Simon Says Stamp & Show Vintage Monday Challenges - Challenge:  Dotty - Pages 5 and 7 of my mini album have polka dot backgrounds, and lots of dots here and there - And...I just LOVE using products from Simon Says Stamp - and my most recent purchase from Simon Says Stamp that I used on this project is the Die-Namics Loopy Flower Die - LOVE IT!
 
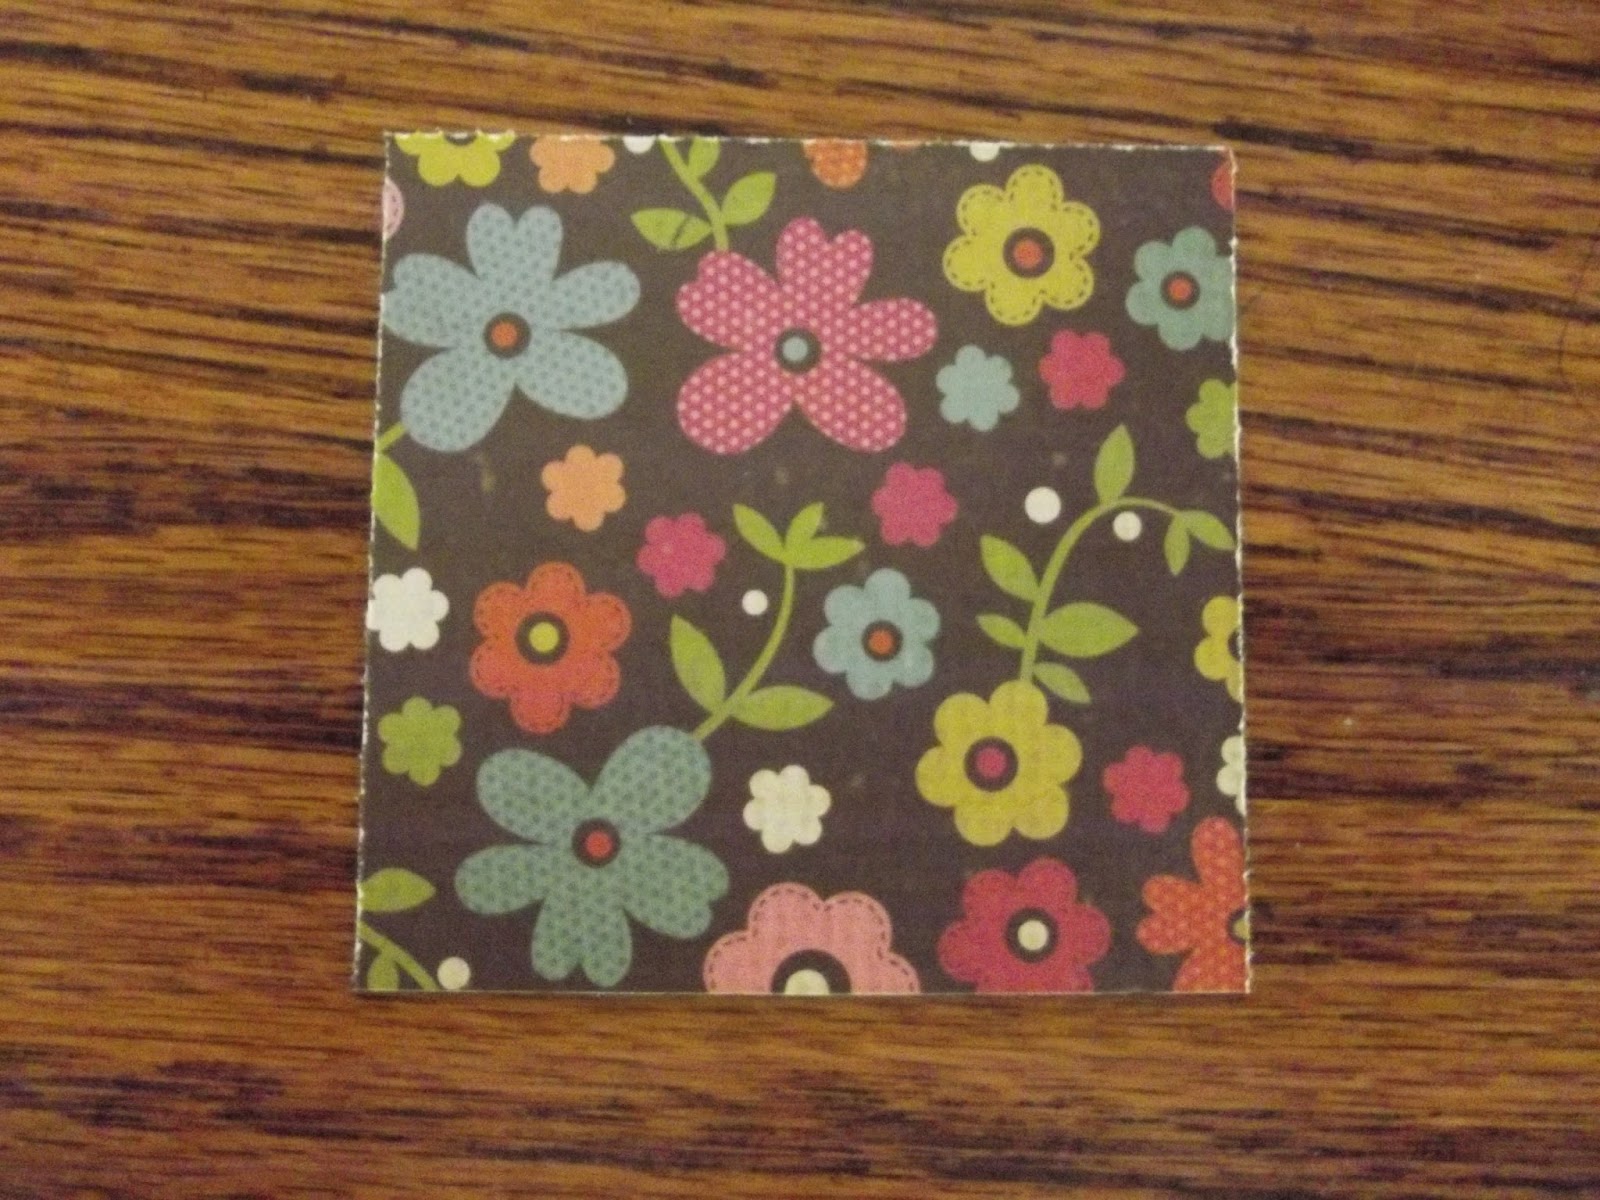
Pile It On Challenge Blog - Challenge #34 - Designer Paper - I have used SO MANY different designer patterned papers on this mini album.   Lots of October Afternoon and a few others mixed in here and there, but LOTS of it - and I love how it looks.
 
Frosted Designs Challenge Blog - Chipboard - I used several pieces of chipboard on this mini album, and I always enjoy implementing chipboard elements into my projects!  I did point out my chipboard elements in the above page descriptions.
 
Top Tip Tuesday - Challenge #108 - Initials (my initials are K and L).  I've used Kaiser Craft products (for the K in Karen) and I've used my Laser Printer (for L in Letchworth) to print all my sentiments.  I shared TWO TOP TIPS in this project:  1.  Use wine bags or other long narrow bags from the liquor store to create mini albums (you can see the photos above and read details).  2.  I used my Laser Printer to create sentiments (which I also mentioned above).  When you don't have the right stamp or rub-on, you simply run a sticker or journaling card through the printer to make the perfect sentiment.  I print it once as a test (on regular paper), and then I tape on my journaling card or sticker in the exact spot where I want the sentiment to print.  I did A LOT of this on the mini album.  If anyone has further questions about this technique, feel free to contact me.  It's an awesome, and very helpful, idea.
 
Simon Says Stamp Wednesday Challenge - Challenge #86 - Anything Goes - One of my favorite categories!  And I LOVE Simon Says Stamp.
 
Thanks for stopping by to take a peek, and be sure to check out all the other helpful tips shared today by the other Design Team Members over at The Kraft Journal.
 
Blessings to you all,

Karen


Monday, August 26, 2013

Copy Your Favorite Designer at TKJ

For this week's new challenge at The Kraft Journal Challenge Blog, "Copy Your Favorite Designer", I knew right away that I wanted to recreate a card from a crafter I've been watching ever since I entered the card-making and scrapbooking world; and this is the lovely and talented Melissa Phillips of Lily Bean Paperie.  More specifically, I was inspired by this card Melissa created... "A Latte Love".  You will fall in LOVE with Melissa's sweet style if you're not already a fan.  I found it VERY appropriate that FOUR of our TKJ DT Members also chose to copy Melissa, and consider her their favorite designer.  It says a lot about her talent, and how she inspires people.
Karen Letchworth for The Kraft Journal
My card all started with a Lunchbag Kraft Note Card that I covered with some patterned paper and then added a strip of Pink & White Stripe Washi Tape.  Next, I took a Small Glassine Bag and filled it with colorful sequins to match my patterned papers.  I ran another length of the Pink & White Stripe Washi Tape up the side of the Glassine Bag that was covered with a little hand-cut index card made from a scrap piece of Lunchbag Kraft Cardstock.  I used lots of other goodies here from The Kraft Outlet including a Grungy Prim Tag and some Pastel Hemp Cord.  I also used some lovely Papertrey Ink die-cuts to make my flower, stem and leaves as well as some miscellaneous rub-ons, a tiny Making Memories white metal heart clip (stash item), a Cosmo Cricket banner sticker, and a tiny Making Memories pink button in the center of my flower that has a snippet of Pastel Hemp Cord in turquoise blue.
 
Thanks so much for stopping by my blog today to say hello.  I always enjoy having you stop by, and I look forward to visiting your blogs as well.  If you are able to play along in a few challenges this week, I really hope that you will join us at both The Kraft Journal Challenge Blog for our "Copy Your Favorite Designer" Challenge, and also at Word Art Wednesday Challenge Blog for another fun Anything Goes Challenge.  You are most welcome at both!
 
Have a very blessed week!
 
Karen

Wednesday, August 21, 2013

Tell God That You're Thankful

When I was on Facebook the other day, I saw a quote on a friend's wall.  It REALLY made me think long and hard.  This is what it said:
 
"If you woke up this morning, and ALL YOU HAD were those things that you thanked God for YESTERDAY, what would you have?"
 
WOW!  Let's be honest here.  How often do you stop and say, "Thank you, Lord, for my husband, and my children, my friends and relatives, my home, my food, my warm bed, my arms that move, my legs that can walk, my health, my job, my health insurance, the hair on my head, my fingernails and toenails, my teeth, gums and lips, my senses, my vehicle(s), my church, my pastor, my country's freedoms......and this list can go on and on.  We have SO MUCH for which we need to be thankful.  I don't doubt that each of us truly IS grateful, but how often do you actually TELL GOD that you are thankful for all these things?    If you really did wake up in the morning and only had those things that you thanked Him for yesterday, what would you have?  It sure has made me far more aware of my need to TELL HIM how grateful I am for even the "little things" that mean so much, and I strongly encourage you to take time to let God know that you don't take ANY of it for granted.  It ALL comes from Him, and we need to give Him thanks and praise for all the good things in our lives.  We sure do tend to complain about all the things that are going wrong, but we shouldn't!  Each and every one of us has blessings that, BY FAR, outweigh the bad things in our lives.  Let's encourage one another to be more thankful.
For this card, I used all My Mind's Eye patterned papers.  I also used  a Martha Stewart lace border punch, three colors of hand-dyed scrunched seam binding, tacky glue, Scor Tape adhesive from Classy Cards 'N Such, some Martha Stewart glitter, and a Prima 3-D gem.  The sentiment is a FREE word-art file available on the Word Art Wednesday blog.
 
This week at Word Art Wednesday, we're having another fun Anything Goes challenge with TWO great sponsors.  One lucky winner will receive some new rubber stamps from Heart & Soul Rubber Stamps, and another lucky winner will win 5 (five) digital images of their choice from the wonderfully adorable Digi Darla's Designs.  I hope that you will stop by and play along with us.  We would LOVE to see what you create this week.

My Craft Spot by Kimberly - Challenge #109 - Use 3-D Items - I used this really cool 3-D Prima gem that I purchased at Hobby Lobby

Craft-Dee Bowz Challenges - August Challenge - Anything Goes With a Handmade Bow - I make my own hand-dyed scrunched seam binding, and I hand-made my bow using it (as I most often do)

Stamp & Create Challenge Blog - August Challenge - Use Glitter - How fun!  I love using glitter, and I used pink and blue Martha Stewart ultra-fine glitters on the edges of this card to make it POP
 
Thanks for visiting me today.  It's always such a treat to have you stop by to say hello, and I will look forward to visiting you all this week as well.  You are each such a blessing to me, and I do thank God for you!
 
My Cup Runneth Over,
 
Karen
 

Monday, August 19, 2013

A Color Challenge at The Kraft Journal

Welcome back to my little space in blog land, everyone!  It's time for a great new challenge this week at The Kraft Journal Challenge Blog where, this week, we are having a "Color Challenge".  The colors in the inspiration photo are all used in my project, and I just LOVE how they look together.  Luckily, I had a little tag for my stamped sentiment and a length of pom-pom trim; both of which worked perfectly with the colors I used.  It couldn't have been any more perfect!  I just love using these sweet little Glassine Bags.  You will see in the last photo (below near bottom of post) how I tucked in a pack of Stride spearmint gum and a gift card.
Karen Letchworth
I immediately fell IN LOVE with the gorgeous colors in this week's Color Challenge, and I decided to make a little gift card holder.  So, I grabbed a darling little Glassine Bag and covered it with an adorable Small Canvas Tag (which, by the way, is just the right size to fit on the front of the Glassine Bag).  These are the perfect size for giving a gift card or small treat (as you will see in the photo below).  Next, I took some wool felt in each of the colors represented in this week's challenge, and cut flowers and leaves to adorn the front of my project.  I secured a button in the center of each flower, with some Natural Hemp in the center of one.  I used a Paper Sweeties sentiment to stamp "So Sweet of You" on the tag, added the green pom pom trim, sprinkled on a bit of ultra-fine glitter, and.....WHA-LA!!  I was ready to use my gift card holder.  The Kraft Outlet is just filled with awesome products to make crafting a breeze!  I really hope that you will check out the awesome supplies in our shop, and then stop by The Kraft Journal Challenge Blog to play along in this gorgeous "Color Challenge" with us.  You need to use either Kraft paper, and/or supplies sold in the Kraft Outlet store.  Anyone can play along!
Karen Letchworth for The Kraft Journal
Thanks so much for stopping by to say hello.  It's always so nice to have you visit, and I appreciate hearing your thoughts.  As this post goes live, my hubby and I are at a local "Las Vegas Luxury Hotel" celebrating our 28th Anniversary.  I'm so grateful for Blogger's feature allowing me to schedule my blog post.  I look forward to visiting each of you to see what you've been creating this week.  Please, always remember that you're all welcome to join our Anything Goes challenge this week at Word Art Wednesday as well

I'm going to share this little project here:
Mark's Finest Papers/Friends of Speedy TV - Challenge #86 - Sentiment Only

Simon Says Stamp Vintage Monday Challenge - Carnival - When I think of the carnival, I think of bright beautiful colors, and snacks.  This project implements both!

The Cheerful Stamp Pad Challenge Blog - Challenge #67 - Your Choice - I just LOVE using wool felt in my die-cuts, and I hope those who see this project will enjoy it as well

God bless you all!

Karen

Sunday, August 18, 2013

Wishing You God's Richest Blessings

Hi, my bloggy friends! The card I'm sharing today is filled with blessings for that special day in some one's life!  All the supplies I used are from Classy Cards 'N Such.  I've really enjoyed being their Guest Designer, and I highly recommend this lovely store.  And don't forget....you can SAVE 10% OFF all your orders using Coupon Code KAREN-10.
There's just something SO soft and sweet about the gorgeous colors of the patterned papers found in the Simple Stories-Vintage Bliss 6x6 paper pad.  I used three different patterns from this lovely collection along with a sticker tab (bottom left) from that same line.   I machine stitched my papers in a matching pink colored thread. For another soft touch, I lightly brushed the edges of my card in white acrylic paint.  The next step was to adhere a small piece from the beautiful Frilly Flourish Swirls - White Pearl.  I placed that in the upper right-hand corner. 

I used a two-part sentiment from the Rubz Birthday - Inspirational by My Sentiments Exactly!.  One part of the saying is rubbed onto a journaling block cut with the lovely Spellbinders Labels Eighteen die, which I double matted. The smaller portion of the Happy Birthday sentiment is rubbed onto a small sticker. 

Down in the lower left-hand corner, I added a bow made using the Seam Binding - Chalk White and topped that with a few of the lovely Zva Creative paper roses in both Pretty Pink and Soft Blue Transition. 

I adhered my paper roses to the card using the AMAZING Scor-Tape. That stuff is truly awesome, and holds things SO well.  If you don't own any, I HIGHLY suggest this item to everyone.  It's just one of the MUST HAVE items, and is truly SO helpful.

All these great Classy Cards 'n Such products came together beautifully to create this simple little card.  I just think the store is CHOCK FULL of gorgeous things to help make your card making and creating SO easy.  Thanks for stopping by today to take a peek.  I hope that you will have a BUNCH of fun browsing through our amazing store.

I'm entering these challenges:
Simon Says Stamp Vintage Challenge Blog - Make The Cut - Use Die-cuts, Punches, Etc.  I used a Spellbinders Labels 18 die-cut for my sentiment

That Craft Place Challenge - Stitching/Real or Faux - Mine is machine stitching using a matching pink thread

DL Art August Challenge - Anything Goes - Special thanks to sweet Diana for hosting these amazing challenges she does!

2 Creative Chicks Challenge Blog - Anything Goes for Kids - This birthday card is for a child (my Great Niece who lives in Leavenworth, Kansas)

Paper Playtime Challenges - Challenge #17 - Use Pearls - I used a lovely Frilly Flourish pearl swirl on my card
 
Have a blessed day!
Karen

Wednesday, August 14, 2013

Back 2 School for Alexa

I've been making a lot of Back 2 School cards this week.  Since I made one for a friend who requested one, I figured.....why not send one to my niece, Alexa.  She will be starting the 1st Grade next week, and she always enjoys getting cards in the mail from her favorite Auntie Karen.  So, this is going in the mail to her right away.  She spent a whole month in Russia with her Baba Natasha and Mother (and oh, how my brother missed her!!).  I missed seeing her while I was visiting which was a real bummer for me.  I miss spending time with her because she's just growing up SO fast.
Alexa at the "Datcha" (Cabin) in Russia
She is such a little sweetheart, and I miss her SO much.  I wish I could have seen her this summer, but most of all I want to wish her a BLESSED year in the 1st Grade this year.  She's going to a private Christian School this year (praise God)!  This is the card I'm sending to her:
This card was made using all Cosmo Cricket papers, some October Afternoon stickers and button, some jute twine, and vintage trim.  I would normally have sewn the edges, but my poor old sewing machine is giving me trouble.  I think it may be time to make a purchase of a new sewing machine.  I just hate spending the money, and I'm always SO worried that a new machine won't be good working with paper.  I will just say a prayer and hope for the best, and ask God to provide me with a good new machine at a fair price that works well with card-making (sewing paper).
 
These are the challenges where I'm sharing this card:

Docerela Stamp Shop Challenges - August Release Challenge #43 - Buttons and Ribbon - I absolutely LOVE Docerela Stamps.  They will be a sponsor for us at Word Art Wednesday in 2014, and I am just THRILLED about this.  I'd love to win some of their lovely stamps!  On this card, I used an October Afternoon cream colored button, and for the ribbon I used natural jute and a lovely rich, vintage brown lace at the bottom

2 Creative Chicks Challenge - Anything Goes For Kids - If you read the story above, you will know that this is a special Back-to-School card for my sweet niece, Alexa.
 
Thanks for visiting me today.  If you'd like to leave a comment, I will stop by your blog to say hello!
 
God bless you all,

Karen

New Challenge at Word Art Wednesday

It's hard to believe that it's already Wednesday.  Where do the weeks go?...I often wonder.  It's been a busy week at our house.  I met with the surgeon on Monday, and I will be having shoulder surgery to repair my right rotator cuff in the next couple of weeks.  I am SO blessed to know that God is in control, and that He will see me through this.  I just hope I'm not out of the craft room for too terribly long because I get a little grumpy when I can't be creative.  Hopefully, I can at least do my blogging.   I'm trying to get my DT work done ahead of time before surgery so please pray for me.  I like being organized.
 
Our challenge this week at Word Art Wednesday is, as always, Anything Goes as long as it meets our Challenge Guidelines (see blog for details).  We would LOVE having you play along and share your art in our challenges.  We have TWO GREAT PRIZES THIS WEEK!!   Check out the challenge blog for details here:  Challenge #93
To make this card, I followed a sketch from Paper Sweeties and used some older Daisy D patterned papers from my stash (red and cream stripe and wagon paper).  The paper doll, her outfit, shoes and the A+ Student sentiment are from Paper Sweeties.  I used Tim Holtz Barn Door Red ink pad, Baker's Twine is from The Twinery, gem stickers from Recollections, and Vintage Black Trim is from V's Sweet Ideas.
 
I'm entering this card in the following challenges:
 
Paper Sweeties Blog - Inspiration Sketch #10 - I used several Paper Sweeties Stamps on this card including Emma, her outfit and shoes, and the A+ Student sentiment.  I followed the darling sketch for this month's challenge

Simon Says Stamp Vintage Challenges - Make The Cut - Use die-cuts and punches - I used a scalloped border punch and a flag die-cut for my sentiment
 
2 Creative Chicks Challenge Blog - Anything Goes for Kids
The above photo is the inside view of my card that has this week's word art/scripture file printed onto a piece of canvas and matted on the inked matching patterned paper.  If you are able, we would just LOVE to have you  play along with us this week at Word Art Wednesday Challenge Blog.  You are always welcome to share your creations with us for the chance at THREE awesome prizes this week.  We hope to see YOU there!
 
Have a blessed week,
Karen

Tuesday, August 13, 2013

For a #1 Teacher

It's getting to be that time of year again when children are heading back to school.  We aren't starting school at our house until the first week of September.  Most private and public schools in our area are starting a bit sooner, and a friend asked me to make a little gift card holder for her daughter's teacher.  I decided to make a Library Pocket and I covered it with Black Chalkboard Paper from The Kraft Outlet.
I also used some washi tapes and Tim Holtz Ruler Ribbon from The Kraft Outlet, a small torn piece of a Nostalgiques sticker ruler, VersaMark white chalk ink, wide red May Arts ribbon, and I simply can't remember what company the Library Pocket is, but it was in my stash.  There's plenty of room for my friend to tuck a gift card inside the pocket.  I hope the teacher likes it.
 
Thanks for visiting me today.  It's so nice to have you stop by and take a peek at this little gift holder.  I look forward to visiting your blog and seeing your creations this week as well.

Blessings,
Karen

Monday, August 12, 2013

School Days...School Days

How many of you remember the old song, "School Days, School Days"?  I can remember singing this when I was in about the Third Grade.  It was a simpler time when this song was written. 
 
School Days, School Days
Dear Old Golden Rule Days.
Reading, and Writing and Rithmatic...
All to the tune of a hickory stick.
 
You were my Queen in Calico,
I was your Bashful Barefoot Beau.
When you wrote on my slate,
"I LOVE YOU SO";
When we were couple of kids.
 
I enjoy thinking about a simpler time.  Like the days of Mayberry RFD, Leave It To Beaver, and Father Knows Best.  Back when we called adults Mr. and Mrs., and said yes, ma'am and yes sir when we answered adults.
 
So anyway, I made this card with a simpler time in mind.  I added a metal Bible embellishment.  It's a reminder to me of how grateful to God I am for allowing me to home-school, and privately educate, our children.  They have grown up knowing God's Word and having it implemented into their educations.  I am SO grateful for that!
 
One of my fondest "Back-to-School" memories of all time was every year when my Mom would take me shopping for new shoes.  I had to wear corrective shoes, so I didn't get to pick from the "cool shoes", I had only a couple of choices and they were pretty basic/a little ugly (but they were good for my feet and my Mom really DID know what was best for me).
I'm entering my card in these challenges:
 
Sugar Creek Hollow - It's A Child's Life - I thought I'd share this vintage Back-to-School Card

Simon Says Stamp Vintage Challenge - Make The Cut - Use Die-Cuts, Punches, Etc.  I used a large circle punch to make the circles cut in the Vanilla Bazzill - it's hard to see because the washi tape is over it.  I also used a die-cut for the School Days frame.

Paper Sweeties - Challenge Sketch #10 - I definitely got creative with this sketch and flipped it around, but all the elements are there.  I used a Paper Sweeties stamp for my sentiment (School Days).
 
I'm so glad you stopped by today for a little peek, and I hope that you will be back by again soon.  If you're looking for another fun Anything Goes Challenge, you're all warmly welcomed to join us at Word Art Wednesday Challenge Blog.  We LOVE making new friends.
 
Have a blessed week!
Karen


The Kraft Journal - "Sew-So Special"

This week, the challenge at The Kraft Journal Challenge Blog, our theme is "Sew-So Special", so I decided to create a sweet little sewing related card.  I started my project with a Lunch Bag Kraft Note Card.
Karen Letchworth for The Kraft Journal
Next, I layered a piece of Black Board Paper to the card base, and then hand-stamped various vintage sewing images onto Lunch Bag Kraft Cardstock as well as on a Grungy Prim Tag (I stamped the thread spool onto a Grungy Prim Tag - great for that vintage look).   Once I had stamped all my images onto the Lunch Bag Kraft Cardstock, I decorated the pieces of cut Lunch Bag Kraft Cardstock with various items from The Kraft Outlet including the following:   A scrap of burlap from a Mini Burlap Tag, a Tim Holtz Memo Pin, two stickers with clear plastic tops from the Custom Fasteners set, a few lengths of Black Twill Tape that I used to go around the bottom of my card and to create a bow.  I also used some Pebbles in My Pocket black gingham ribbon in this bow and placed a wooden button in the center.  I added a few lengths of Black Baker's Twine here and there.  The stamps sets I used are from Mark's Finest Papers (sewing machine) and Papertrey Ink (thread spool and vintage sewing accents).  I hope you have lots of fun with this week's "Sew-So Special" Challenge
Thanks for stopping by to take a peek!  It's so nice to have you visit, and if you leave me a comment, I will be sure to stop by your blog and say hello to you as well.  You're most welcome to join the challenges this week at The Kraft Journal Challenge Blog - "Sew-So Special, and Word Art Wednesday Challenge Blog - Anything Goes.  It's always "SEW" nice to have you all play along.

I'm sharing my card here in a "Krafty" challenge:
Sweet Stampin' Challenge Blog - Going Krafty

Mark's Finest Papers - "Plaid" Challenge - I used a plaid ribbon on my card, and the sewing machine stamped image is a Mark's Finest Papers Stamp!

Craft Your Passion Challenge Blog - Challenge #175 - Don't Get Your Twine in a Tangle

We're also have a "Name The Owl Contest" at The Kraft Journal Challenge Blog where you can make name suggestions for our owl mascot.  If the name you suggest is chosen, you will win this fabulous prize package from The Kraft Outlet:
 
Have a blessed week!
 
Karen

Sunday, August 11, 2013

Inspirational Birthday Card

Hello all my crafty friends!  I'm back today to share a sweet little card for Classy Cards 'N Such showcasing some of their lovely papers from the Simple Stories Vintage Bliss Collection.  
I used three different patterned papers from that lovely collection, and a coordinating chipboard frame from the same collection.  Some of the sweet embellishments include some Spooled Twines from Doodlebug and a darling Happy Birthday sentiment from the Inspirational Birthday Rubz Set from My Sentiments Exactly.  I punched the butterfly from the same paper pad, added some pearl accents, a stick pin, and a couple of paper flowers from my stash.  There are also two staples in the upper right-hand corner just for fun.

This set of Rubz - Birthday Inspirational is awesome because it has the Happy Birthday sentiment in the set, which I used on the outside/bottom of the card, and it also comes with a birthday sentiment that I placed on the inside of the card by matting it on the same Simple Stories Vintage Bliss papers.   I also added a snippet of washi tape and another pearl accent under that
I encourage you to check out all the delightful trims, Rubz, and embellishments from Classy Cards 'n Such that are sure to help make your cards stand out.  Happy crafting!

Cupcake Inspirations Challenge Blog - Challenge #223 - Happy Birthday (Pastels)
 
Have a blessed day!
Karen

Wednesday, August 7, 2013

Pinwheel Tutorial

Hello friends!  I'm here today to share a quick Kraft Outlet Watch Us Wednesday tutorial for a cute little pinwheel accent.  This is REALLY easy, so please don't be intimidated.  I started with a Small Kraft Paper Sack that I folded into a little gift pocket that I've shared in a previous tutorial.  These make great gift card holders.  And now....here's how to make your Pinwheel:
Start by cutting yourself a perfect square using double-sided patterned paper.  I used some lovely Simple Stories papers that have a cute print on each side.  You can cut anywhere from a 1 1/2 up to a 4-inch square depending on what size pinwheel you wish to create.  This particular pinwheel is made from a 2 1/4 inch square.
The next step is to "score" your square from corner to corner diagonally. To "score" (make a groove in your paper without cutting) my paper, I placed it in my cutter, lined up the corners, and used my Bone Folding Tool in the groove of the cutter to make the indentation showing you where the folds should be made.  Once I scored both corners, you will see in the next photo that I made a small X with my pen.
The reason for making the X is so that when you cut your lines, you will remember to stop at the X and not cut all the way through your paper.  This is the most important step to remember.
This is the area where you will place your glue to make your pinwheel, so be sure that you do not cut all the way through.  You want to leave enough room to place your brad at the end.
You grab every other corner, bringing it to the middle, and using a little dab of glue, secure it to the uncut area in the center of your square.  Can you see how your pinwheel is beginning to appear? Once all your corners are secured to the center of the pinwheel, you're almost finished!  The last step is to secure your pinwheel permanently by placing a brad in the middle.  I used a Tim Holtz Custom Fastener to secure the center of my pinwheel.
I placed a darling little Jenni Bowlin Sillhouette Card in the back pocket where the gift card will also go, and also added some lovely seam binding from Paper Sweeties and a rub-on sentiment that I picked up at JoAnne's.   Be creative, and have fun!  There are all kinds of neat ideas as how to use a pinwheel.  Let your imagination run wild!  I hope you've had fun learning this technique.  You can find the supplies I used, and everything a crafter could ever want, at our fabulous store, The Kraft Outlet.

Thanks for stopping by today, and have a great week.  Don't forget to join our 'Layers" challenge this week at The Kraft Journal Challenge Blog.  You're also welcome to join our Anything Goes challenge over at Word Art Wednesday and our Twine Challenge at V's Sweet Ideas.  Come on, get crafty!

Blessings to you all,
Karen

Simon Says Stamp - August 7 Challenge - Triangles - I made this pinwheel using a basic triangle method.  By folding each corner up, you create the triangles in your pinwheel.  It's a great Math lesson as well.  Triangles are everywhere!